|
Competition Cars & Their Construction This is not meant to be a definitive article, but an understandable description, of what goes into the building of a competition car and why. Having watched the horrific crash that was posted in the ‘Here's one for Hotrod Trev ‘thread , I will ask you to look at it again as notice as the still on the ground car strikes the car that has crossed the centre divide, you will see a sort of cross shaped arrangement where the roof of the ‘off ground' car was. What you saw was part of an assembly called a roll cage, this was almost certainly the major contributor to the fact the driver was not killed. The way these are constructed varies a little depending on the body of the car, a fibreglass bodied car will have a complete roll cage whereas a steel bodied car will have some of the 'shell' as part of the construction of the 'cage'.
Sorry but a bit of engineering knowledge will be needed, so I'll try to make it as painless as possible. The strongest shape in whatever material you choose is a ball, next strongest is a tube (some reservation here for purists), so we have to try to make the safe ‘cell' into one of those shapes. Directly connected to this is the need for a competition car to have ‘stronger' suspension than a road car needs (no consideration for passenger comfort, only for the best /safest suspension set up).
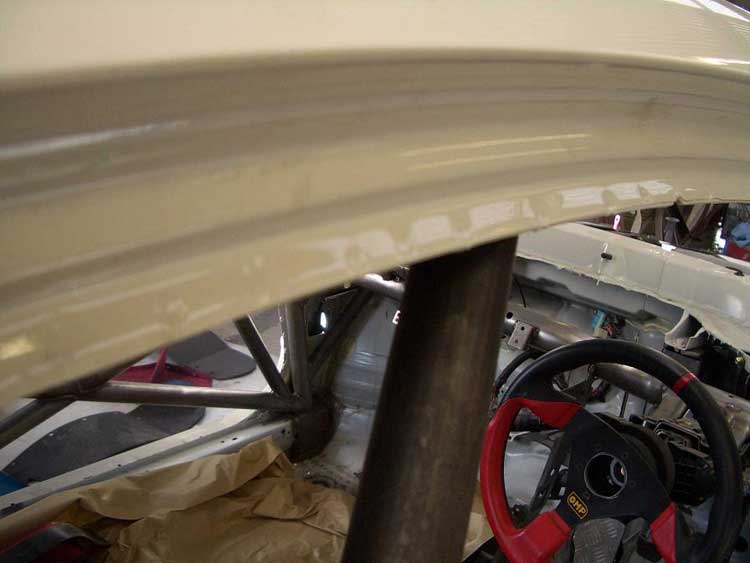
So absolute first requirement is to completely gut the car, this will serve two purposes, first it makes it easier to install the necessary safety items , and help save weight by not re-installing the unwanted parts (reducing weight is one of the two main ways to go faster, increased power is the other). Next it will be seam welded. To make the car (in factory form) strong, the panels are pressed with shaped edges, this gives them strength …..to illustrate, support a sheet of paper on 2 blocks and try to stand something (not silly heavy )on the paper.. The paper wont support the item. Now fold the paper concertina fashion, place the paper on the blocks with the creases top & bottom…. Now the paper WILL support the item) this is one reason the panels around the door frame of the car's shell are shaped (we'll get to others later), If we imagine the car as a sort of box, where the panels meet they are ‘spot' welded (see photo) .
The dark patches on the ‘shiny' paint job are the ‘spot welds' the other panel is behind the one you can see but laying flat against it . Seam welding is welding ALL along the edges where the panels meet, This is done to ALL seams, this not only makes the shell stronger, but makes it ‘stiffer' that's to say less flexible. Having seam welded the shell next a roll cage is installed. This is to protect the occupant(s) if the car should roll over, but a good ‘full' cage will also stiffen the shell even further . This will mean the suspension will have more ‘solid' mountings (the more immoveable the suspension mounts the better the car's suspension can be adjusted to give more accurate control).
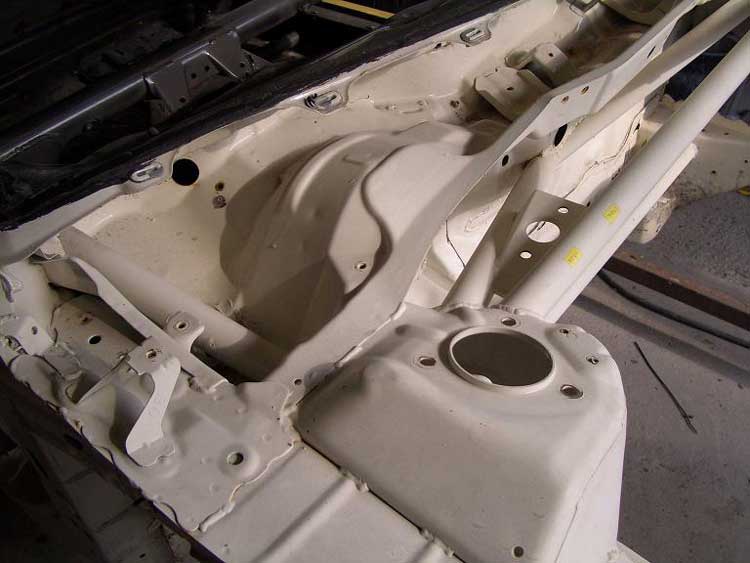
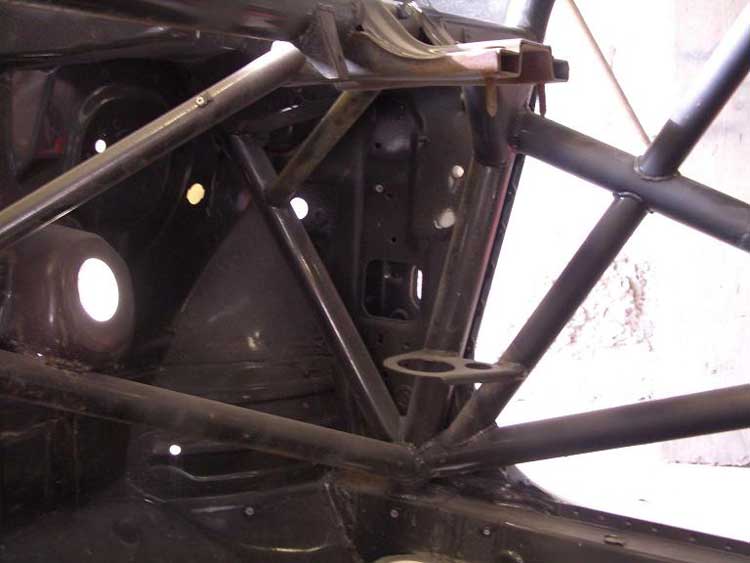
The larger hole with 3 smaller holes is where one side of the (upper part)of the front suspension bolts to, the bar going up the picture connects to the front suspension on the other side (if this bar is removeable, its commonly called a ‘strut brace') The tube to the left goes into the roll hoop behind the windscreen, but below the dashboard.
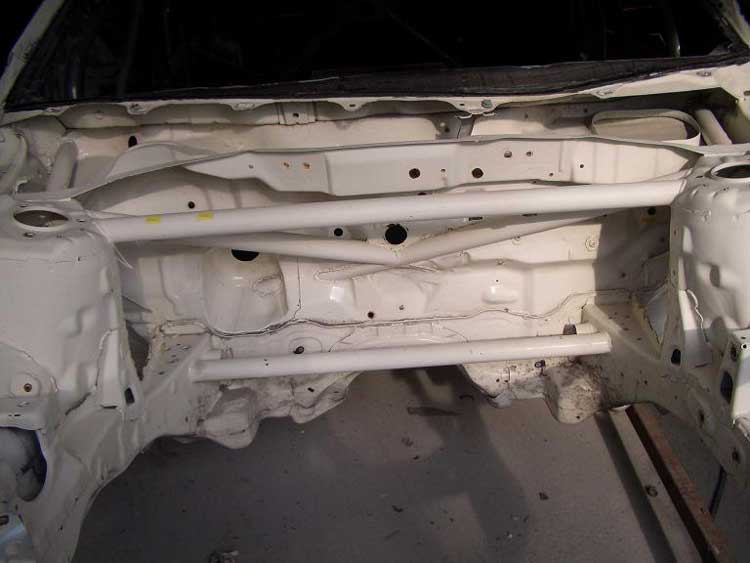
The picture below shows the engine compartment with the ‘strut brace' upper, a lower brace between the chassis rails and the cross brace going through the bulkhead.
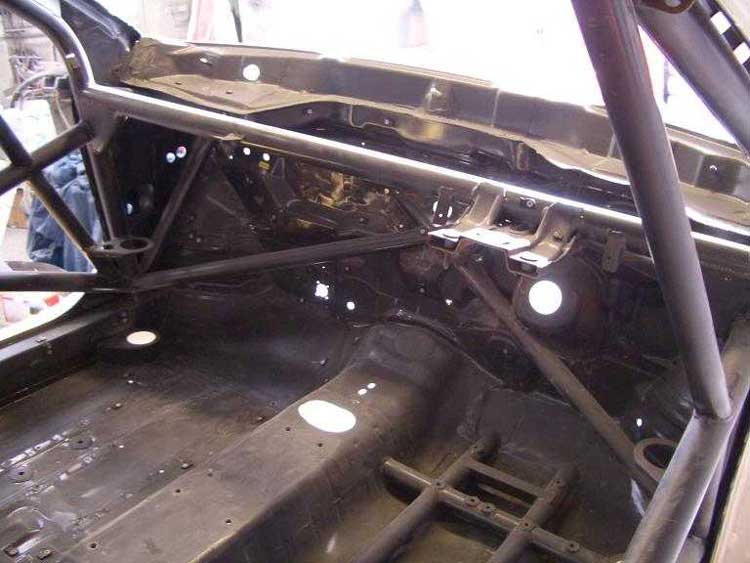
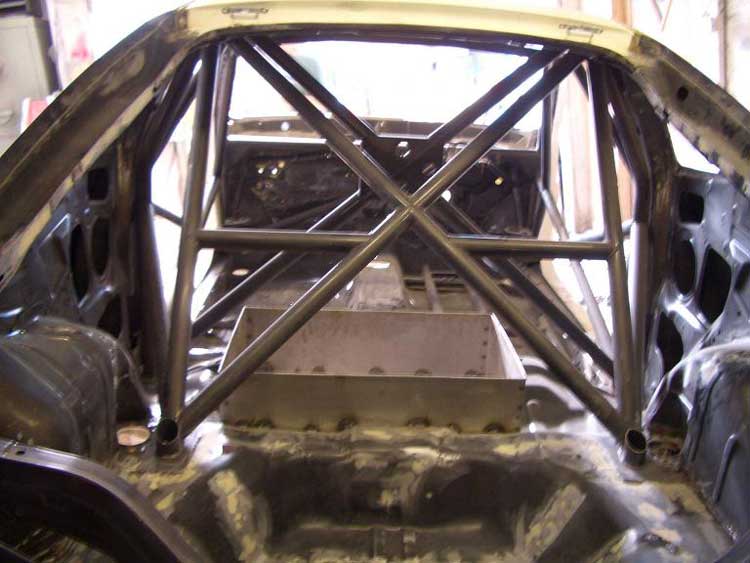
This is the inside of the last piccy. Top left you can see part of the ‘roll hoop' around behind the windscreen, across where the dashboard would go is an horizontal brace to prevent ‘lozenging' (take a matchbox tray out of the box, then try and squash the tray it will go to a diamond shape, that's lozenging) it will also prevent side intrusion should the car get hit in the side (colloquially ‘T boned') Because inevitably the car will be going forward in the event of a ‘roll' the hoops (behind the screen, and immediately behind the driver or ‘B post') will need to be braced forward to prevent them just going flat as the forward & downward motion of the car is placed upon them!
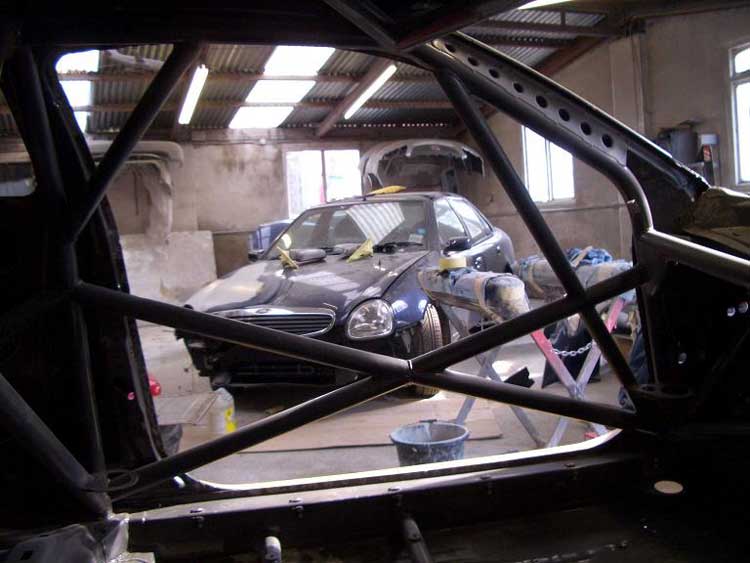
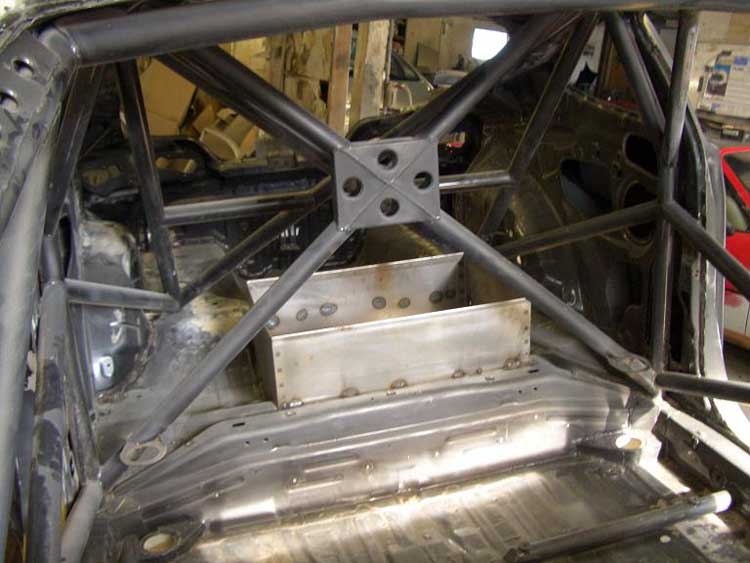
Here's the bracing going from the rear suspension pick up points to the top of the hoop at the ‘B' post. The box in the floor will hold the fuel cell (more of which later).In the next picture you can (just) see the cross braces above the drivers/co drivers heads. You can also see the cross braces to prevent the door ‘hoops' lozenging and to prevent side intrusion. Another snippet of engineering knowledge you will appreciate is that when you have a flat sheet of metal you can cut holes in it (to reduce weight) without reducing it's strength ‘providing' the edges of those holes are ‘rolled' (curved over on themselves) this is called a diaphragm, same as in your torso. The picture below illustrates the use of a diaphragm to locate the roll cage within the shell (where it is near the windscreen pillar). With all body shells along under the doors runs a 'tube' formed by two panels the inner and outer cills these are used as part of the roll cage structure, and to securely mount the cage within the shell.
Here's a picture of where the cage mounts to the cill in the drivers footwell, the flat bracket with 2 holes is for one of the air jacks, the shaped bracket above is to mount the steering column.
This is looking backward from the windscreen. The roll hoop behind the driver's head also goes down to the sills and there is a tubular brace (as part of the backseat arrangement) to also brace the hoop across the car. You can also see the new seat fixings (in the lower right hand corner), these are also newly made and installed, often connected to the roll cage too, the standard seat mounts would not be able to cope with the stresses generated in a crash. There you have your roll cage, with a bit of imagination it could be said to be a ball, a bit slab sided. But there are many people who owe their lives and limbs to these.
|
|||||||